
Hopefully the new panels can be built soon.
The last day I spent some time doing test for building the new panels.
Building the panels will be the same as before – I’m still using a backplate for the swithes and a lightplate for the lettering – but the materials and method of building have changed.
- the backplate will be made on the CNC machine from 1.5mm aluminium
- the lightplate will be 3D printed in white PLA at the correct hight of 6.35mm
A big question have been the creation of the backlighting and the lettering on the lightplates.
The lightplates will be painted in matte black and then the letters will be cut on the laser cutter.
So the first step was looking for the correct laser settings.
I printed a testpiece, painted it black and then did multiple cuts with different settings.

Just after printing I recognized the rough surface of the part.
Although I’m printing on a glass plate, the layer height of 0.2mm was too big and created those imperfections.
After changing the first layer to 0.1mm the top survace improved significantly and is now very smooth.
Some of the laser settings wer quite usabel, some totally failure, but I got a good starting point after those tests.
I printed some templates to test the backlighting, some with holes for my 5mm LEDs and some with channels for the LED strips.

The parts got painted and more test have been made.

At the end I found settings which gave very good looking results.
I also did some tests for the backlighting – for the moment just with the LED strips.
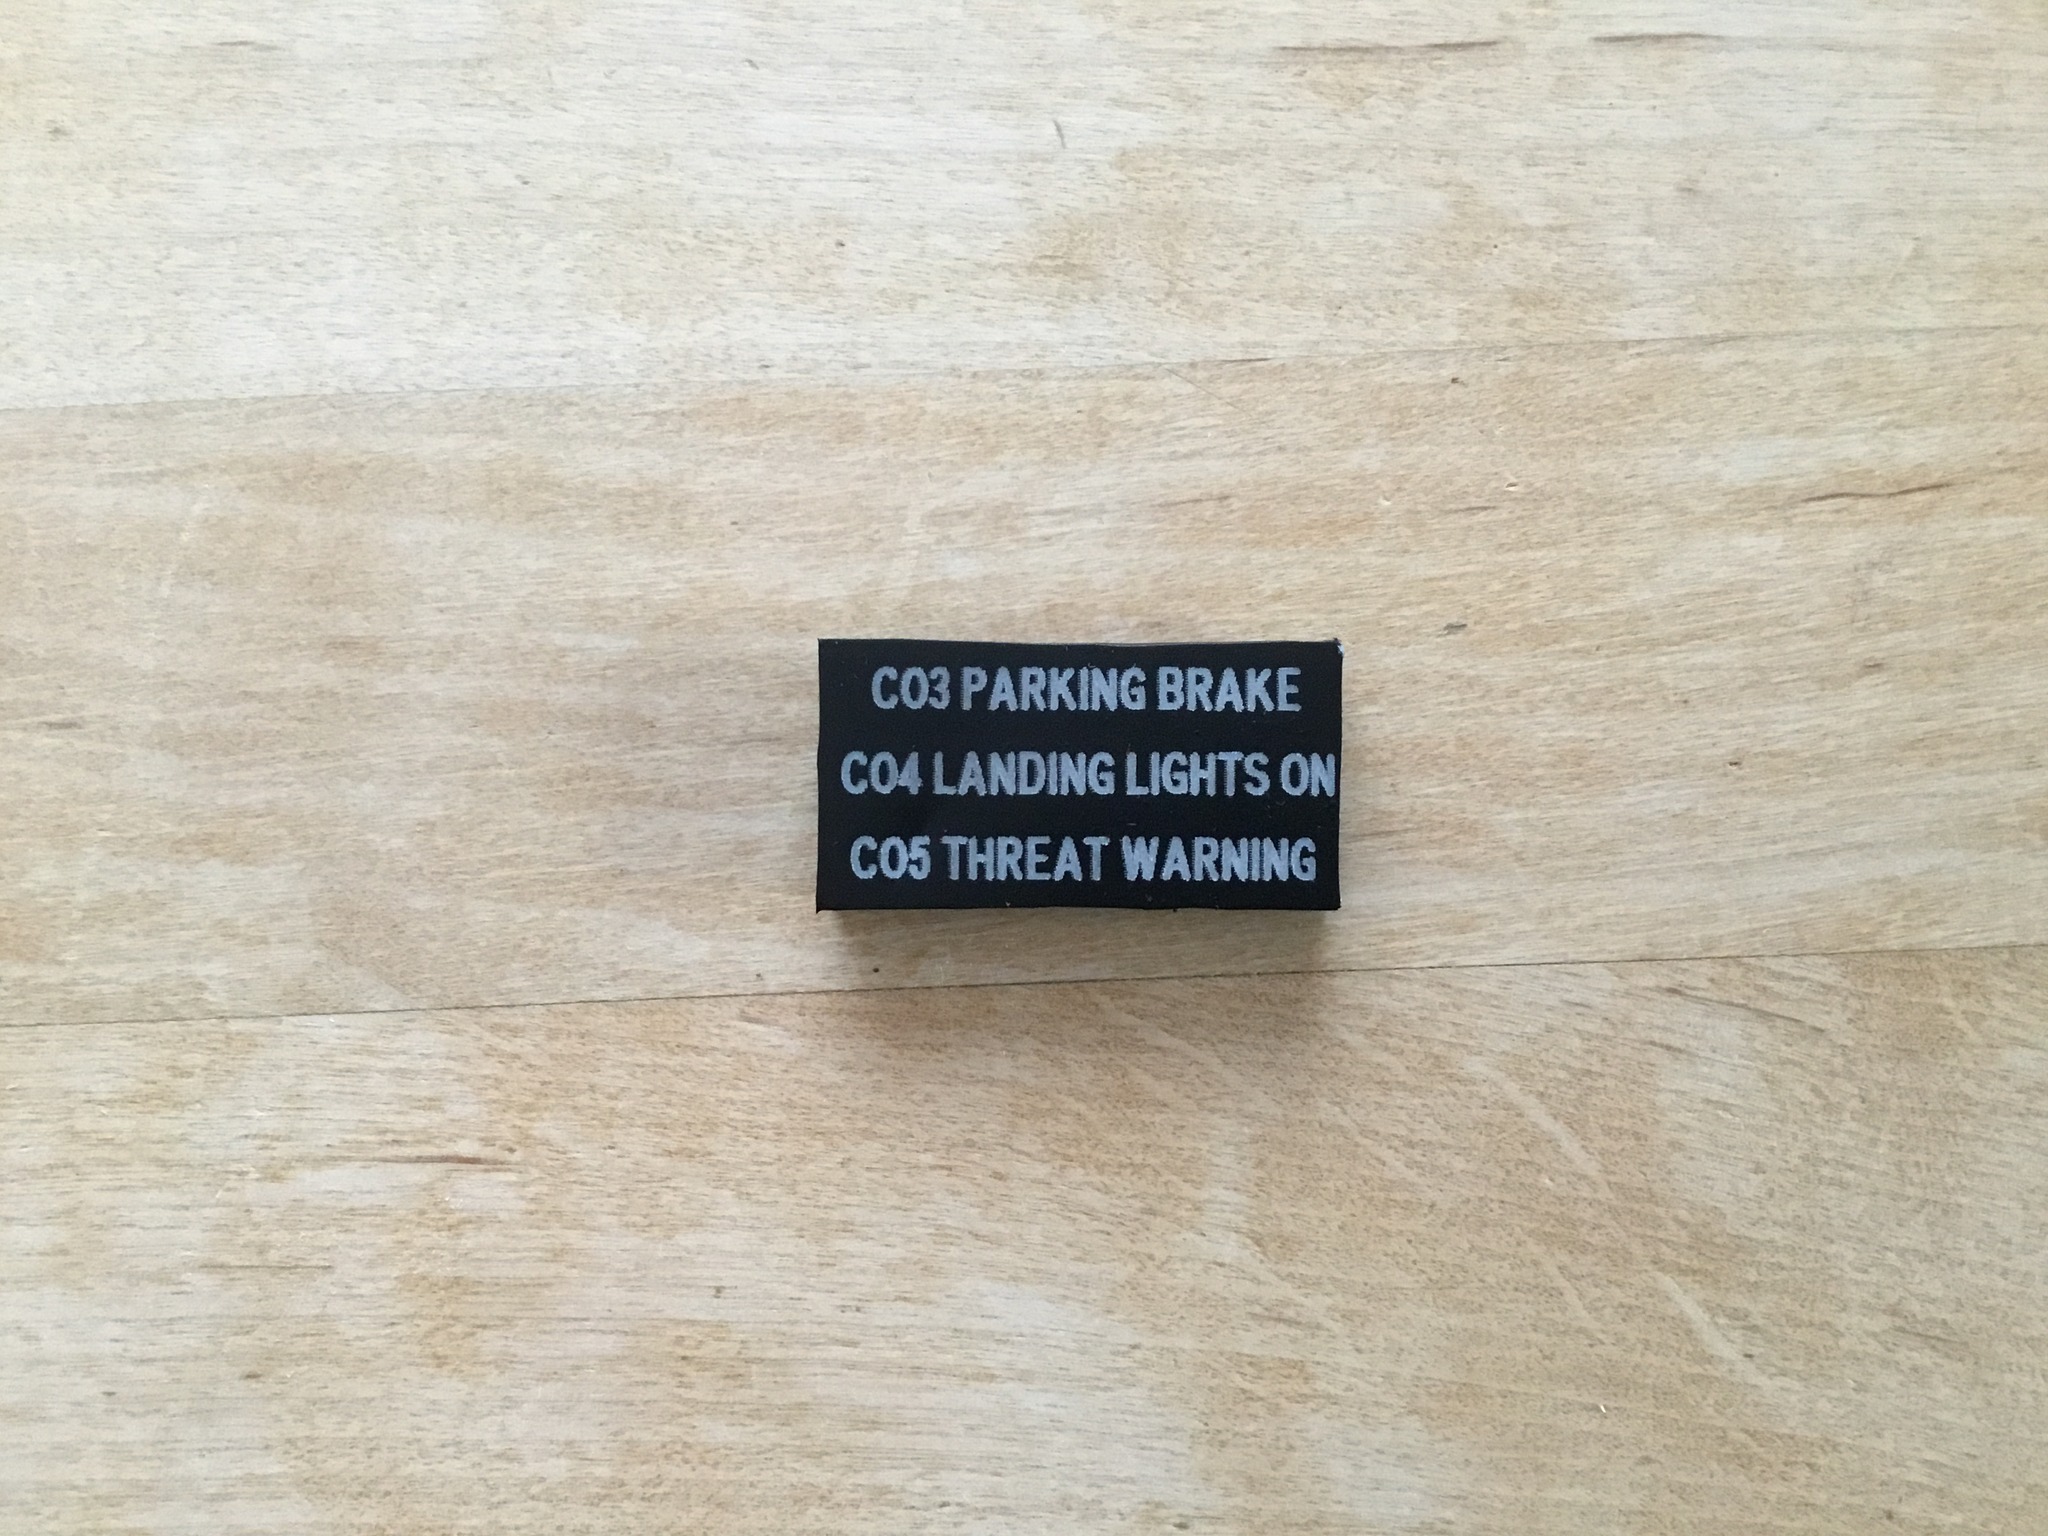
Motivated by the tests I decided to do a “real-life” test, producing the MPO (Manual Pitch Override) panel, since it’s very small.
Printing the lightplate worked without problems, no big deal.
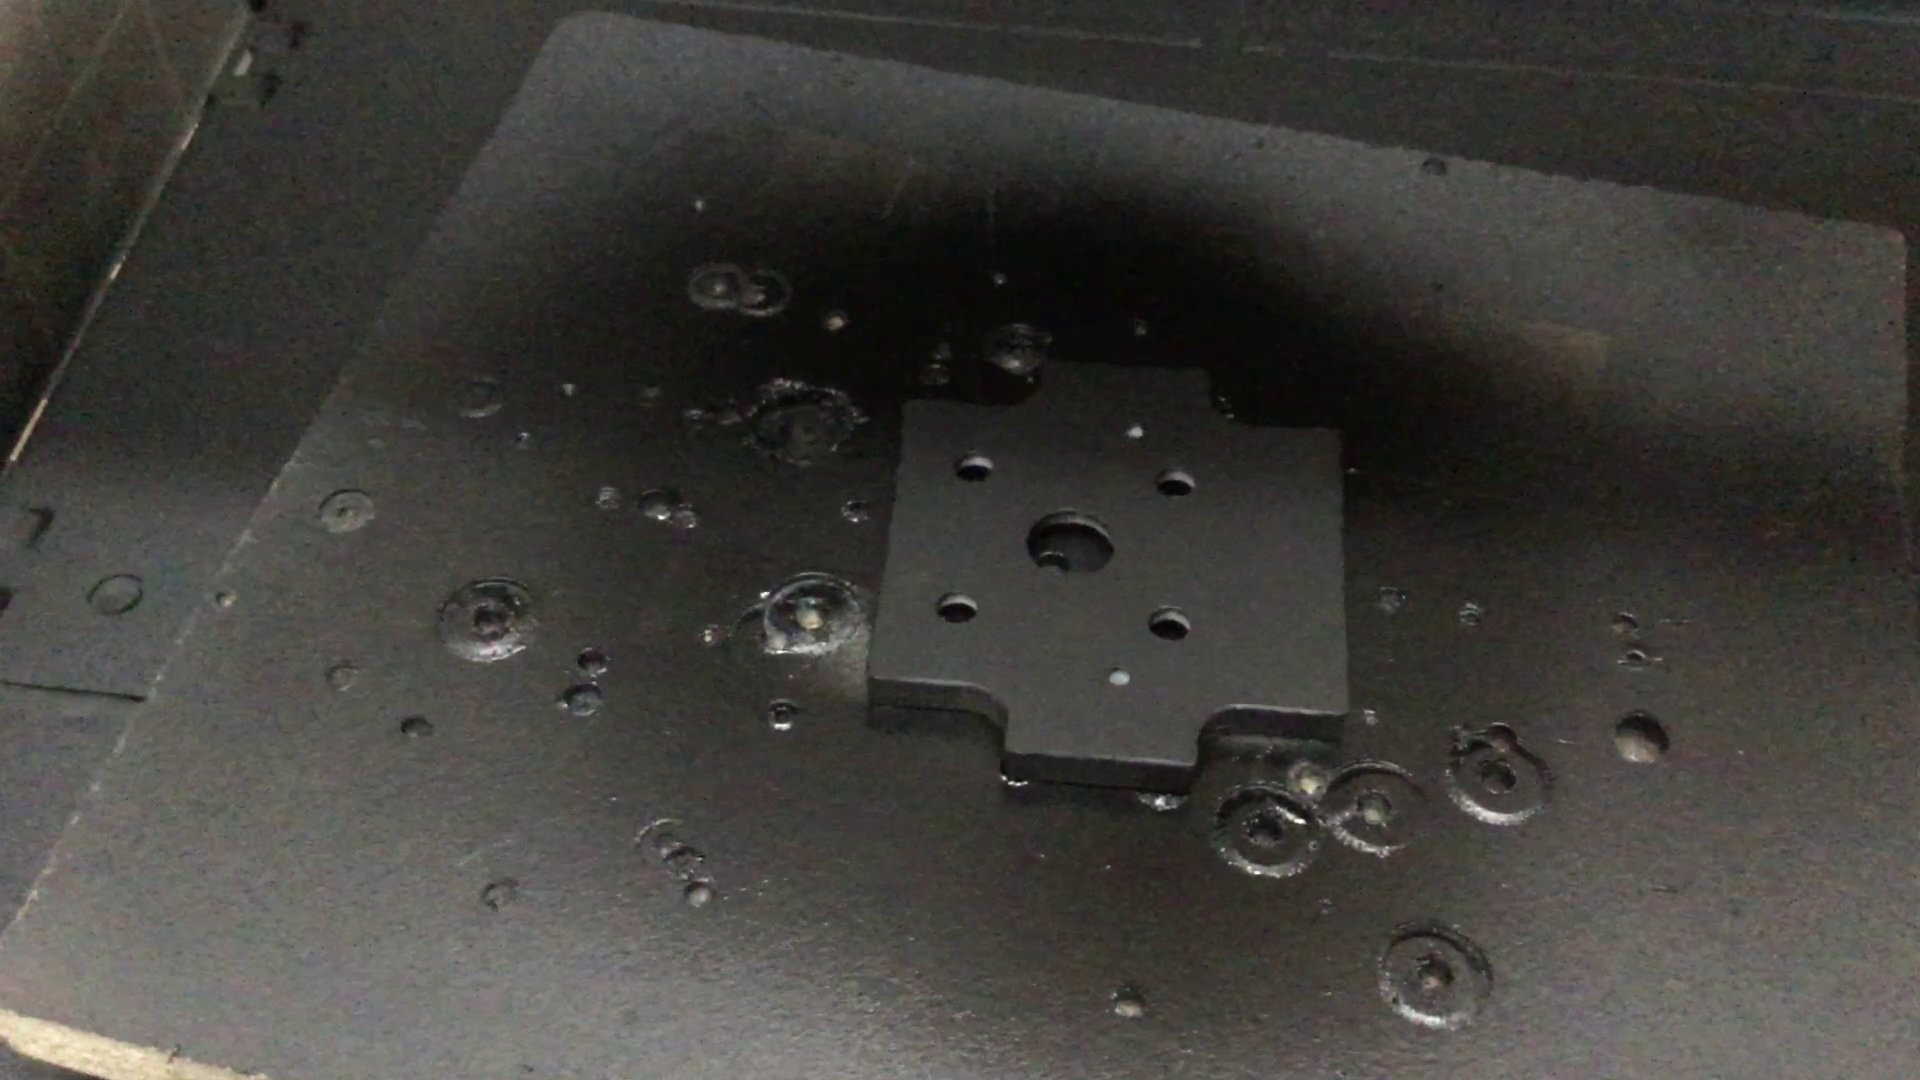
Milling the backplate was my first try of CNC cutting in aluminium. I think there is still a configuration problem in the z-axis, since I programmed a step down of 0.5mm for each pass, but the mill already did the whole 1.5 at the first pass.

At least the 2mm cutter didn’t break and now I know that 1.5mm cutting depth is possible, but not very clean. The holes in the plate don’t look very nice.

Since only the edges and corners of the plate will be visible on the finished panel, I don’t care too much about that, to be hones.
The lightplate got painted black after printing and you can see the very nice surface finish after changing the first layer height to 0.1mm.
Finally I lasered the letters with my tested settings.

And of course I had to assemble everthing for a first showcase 🙂

But the last two pictures cleary show the problem of my workflow – the edges of the lightplate look terrible.
The reason for this is the followin:
When printing the lightplate I configured the 3D printer to do some “brim” to keep the panel from warping at the edges.

This brim has to be removed after printing and I just cut it off with a sharp knife very carefully – or so I thought 🙂
The very crooked edges haven’t been visible on the white panel but after painting black was looking horrible – I coulnd’t leave it this way.
Investing some time thinking about a solution I came up with the idea to remove the brim on my router table with an edge cutting bit.

This idea seemed to be precisely what I needed. The PLA edges cut easily on the router and now everything looks very very clean.


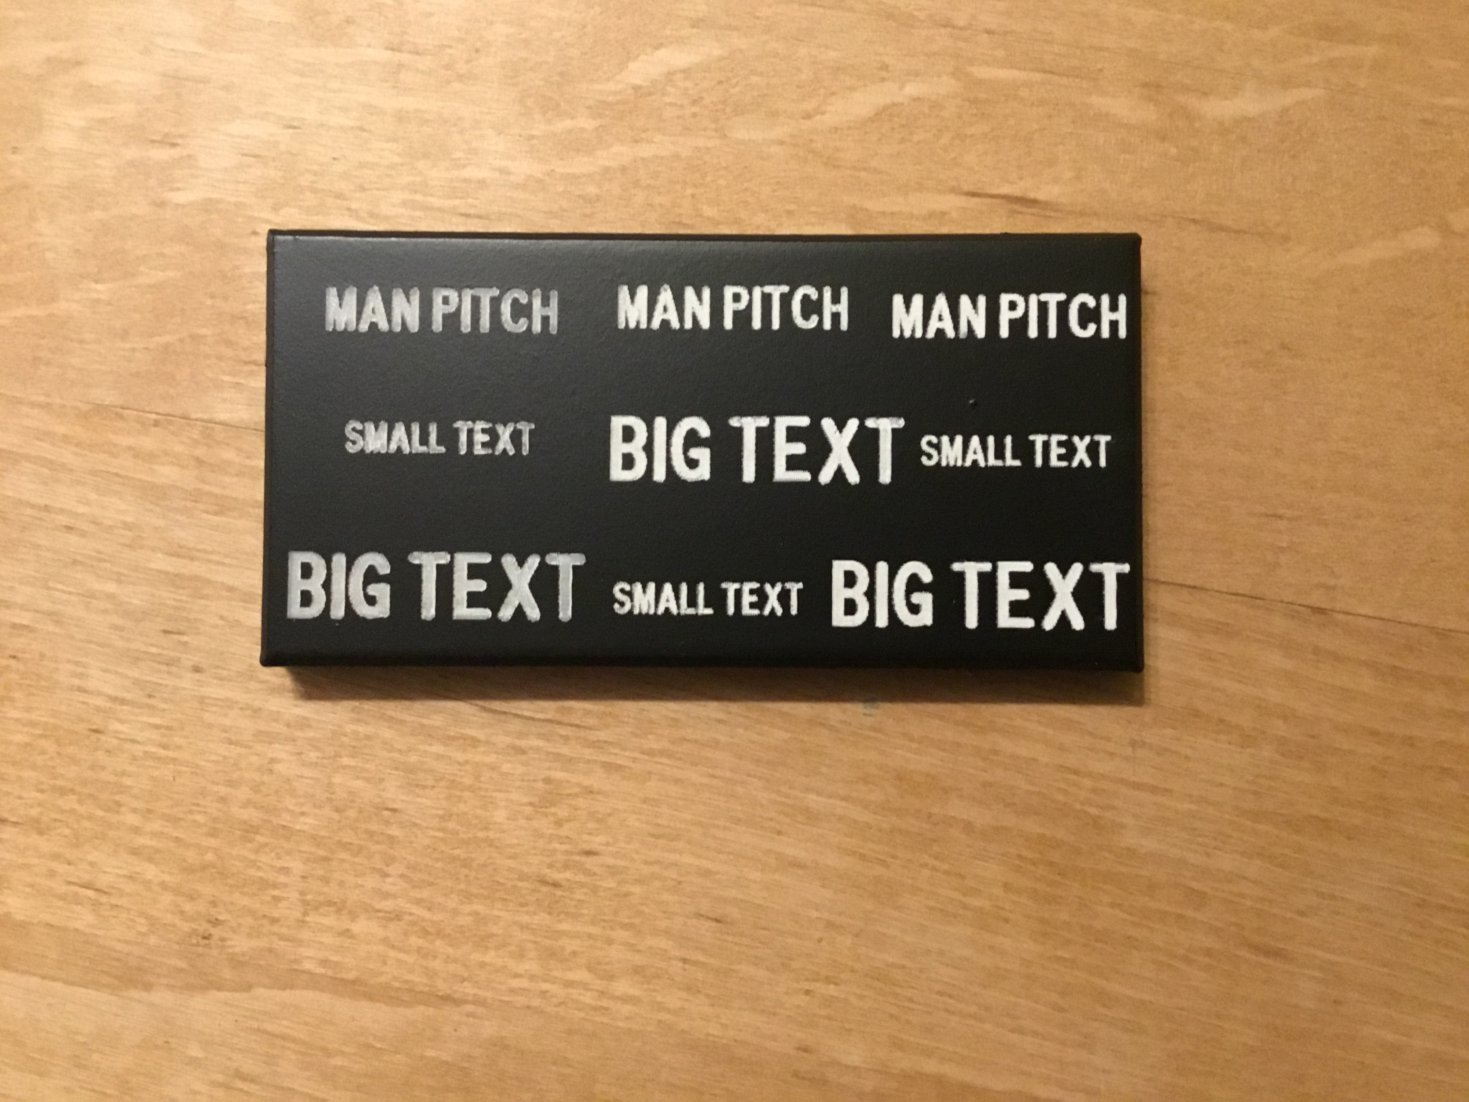
Nevertheless I wasn’t satisfied with the white lettering – it just weren’t white enough. So I started again tinkering with the laser settings.
Here’s the last try with just the white PLA under the paint and it’s already looking much better.

Some more tests will follow, this time I’m going to spraypaint one coat of white and one coat of clear paint before all the black layers.
Let’s see, if this is going to top the current results 🙂
Edit 2023-01-15: YES IT DOES TOP THE RESULTS.
Using one coat of white and clear paint before the black looks just fantastic – I even could reduce the laser power output from 70% to 37.5%!
Edit 2: I just did a short test with the LED strips for backlighting – it even looks better than before, the white paint diffuses the light even more.

Hi dear Michi. Firstly Thanks your share.
I want to ask for laser. Is Your laser co2 based or diode laser(5w,10w,40w etc)?
I have diode laser but when I try to engrave pla it melted with paints
It’s a 5.5W diode laser (Sculpfun S9).
I have one layer of white paint, then one layer of transparent matte paint and then 3-4 layers of matte black paint on my panels.
So usually I never reach the PLA anymore, and the transparent layer helps to protect, also, since the laser can’t cut it.
I’m using 133mm/s at 33% strength of the laser.