I made quite a lot of modification on the racing seem last year, but didn’t document everything properly – I like racing in it too much :D.
Now it’s time to describe all the changes I’ve done.
H-Shifter
I bought a Fanatec SQ Shifter 1.5 at the beginning of 2020 and in May I managed to build the sidemount for it.
It is quite a simple design, a 60×30 aluminium profile I had lying around has been bolted to the rig and I added a leg on the end of it, also bolted to the rig.
An aluminium plate with adjustment slots is used to mount the shifter to the profile and finally a piece of wood got screwed to the shifter from underneath to function as mouse pad.


Seat
Although I’ve been satisfied with the modified gaming seat, using a Loadcell brake showed it’s weakness – the backside tended to flex a lot.
To keep the seat a whole and more importantly to improve break performance I started looking for something better.
Of course I would have liked to get a Recaro, OMP or other top notch brand, but I wanted to keep the price down as much as possible. After some research I found fk-shop.de, got 2 bucket seats for EUR 250,- and sold the second one.

The seat is super comfy and easily adjustable with the included L-brackets
ControlCenter
Since I got the new 32″ gaming monitor the 37″ TV has been available for other things 🙂
Using SimHub I designed my own control center dash, which shows me all the important data about the race, car and computer at a glance.

Driver an spectators can see the following things here:
Starting upper left: trackmap with all cars and positions and the current leaderboard
Starting lower left: current session, position, current lap, session time left, clutch, brake and throttle as vertical gauge, steering angle, gear, speed and rpm, current and last laptimes and sector times, trackinfos : name, trackstatus, wetness, rain, track and air temperature, brake temps, tyre temps and pressures, fuel data: fuel left, consumption, remaining time and some motor data (water and oil temps and -pressure, turbo and exhaust temperature)
In the picture above also the temporary dashboard made out of plywood with displaybx left, buttonbox right, infodash in the middle and the selfmade buttonplate for the wheel are mounted to the wheelbase.
Pedals
The Fanatec Clubsport Pedals v1 have served their purpose well, but since they were quite old, I was looking for something better. A lot of praise can be found about Heusinkveld on the internet, but 700,- for a pedalset are quite too steep for me.
In September 2020 I searched the Austrian equivalent to craigslist (willhaben.at) for “Heusinkveld” and funny enough found a set of Sim Pedals Pro for 450,- right in my hometown.
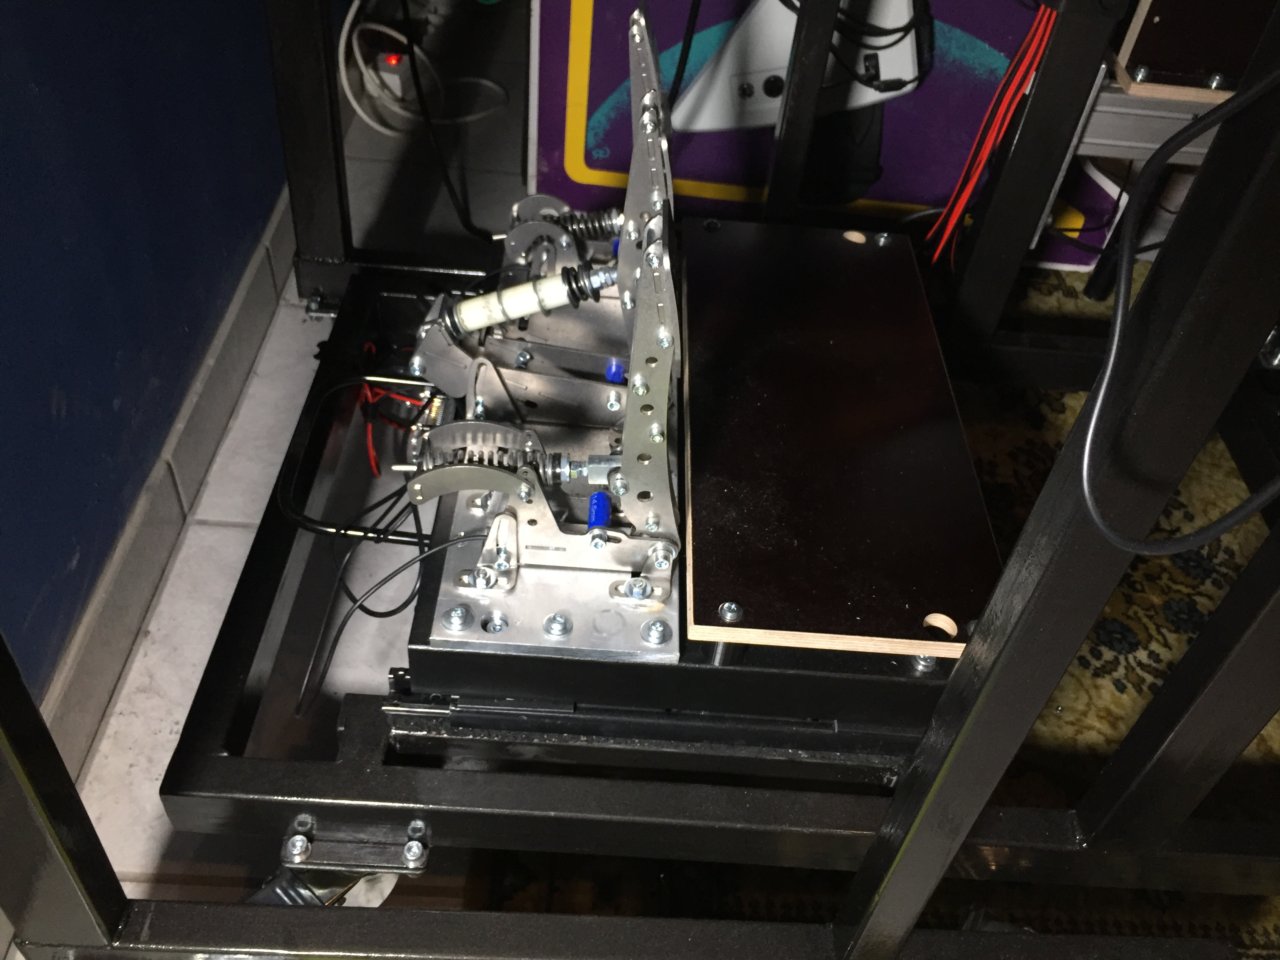
Since they have to be mounted quite differently to the Fanatec I needed to build a new pedalplate. Breaking pressure is quite high (up to 55kg) so I used a sturdy 10mm aluminium plate I had in my material stash and some plywood for the heelrest. The bass shaker also fitted perfectly onto the heelrest, so I was a happy camper.


Wheelbase
I have been using a Fanatec CSL Elite+ Wheelbase since October 2019 becauer I’ve been racing mainly GTSport on the PS4. But when I upgraded my PC with a new graphics card, Assetto Corsa Competizione became my alltime favourite, and with rFactor2, DirtRally2, AC or AMS/2 added I race on PC only.
Using a direct drive wheel has been a long dream, I just couldn’t decide which system to use. Getting a Fanatec DD would have been the logical choice because I could have used all my wheels with the new base. But reading about driver issues and not so perfect support made my decision about getting a Simucube 2 Pro easy – and it arrived in October 2020.

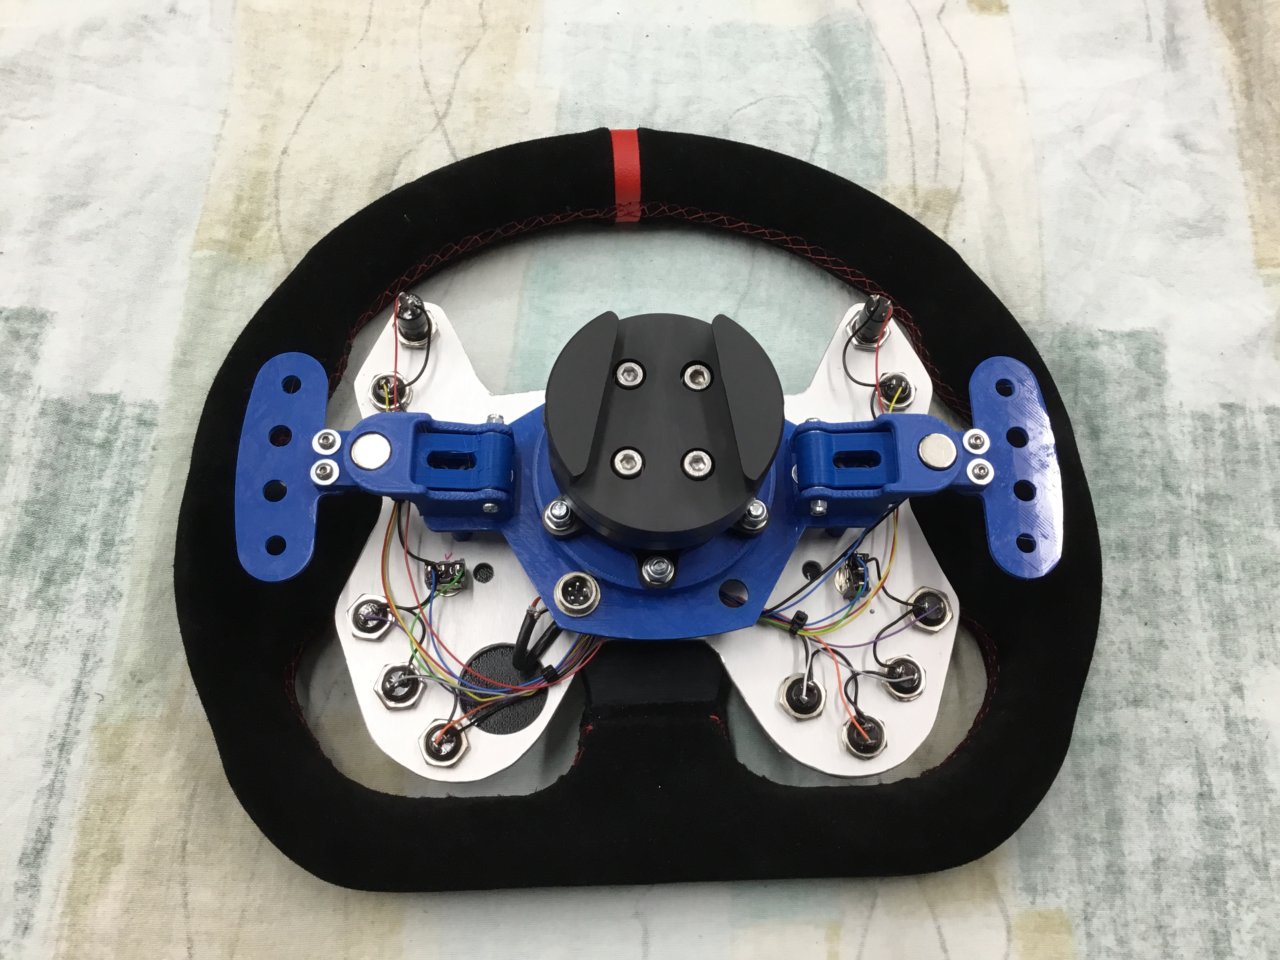
Since I couldn’t use my old Fanatec wheels anymore I took my D-shaped wheel and build a DIY solution for it with an Arduino ProMicro, self designed shifters and the Simucube QuickRelease.


Getting the Simucube I was confronted with another problem – where to put those 2 power supplies?
When I build the monitor stand for the rig it was supposed to be just provisional – and so I designed and welded my own monitor/pc-stand. Using the leftover steel from the rigbuild, some plywood from my stash, the last 60×30 alu profile, some leftover aluminium plate and an old monitor holder I had everything I needed to finish it quite fast.


Keyboardholder
While having a little time I decided to replace the ugly wooden keyboard tray with something better. Once again, I had all of the parts at home and now the keyboard can be set in different positions.


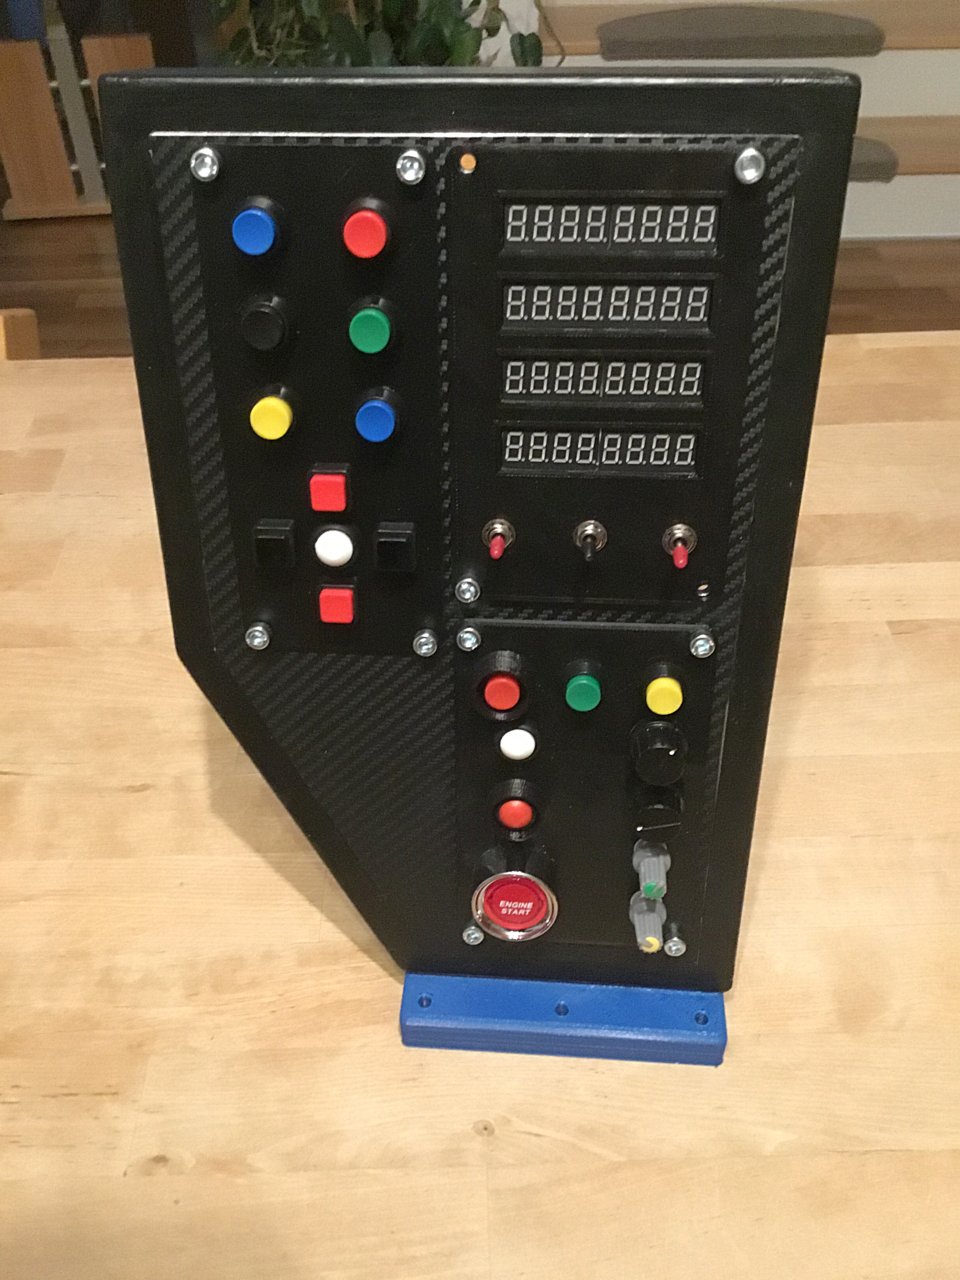
Buttonbox
The old mounting positions for the starter buttonbox and infodisplay box were not available anymore since I sold the Fanatec base, so I planned to build some kind of middle console like in real GT3 cars.
Using the old pedalplate for the alu, I designed a new buttonbox in Freecad, since my Bodnar BU836 hat some spare inputs left and printed it with my 3D printer.
Everything to mounted into a wooden frame (“form follows function”) and the frame itself got printed mountingplate so I could screw it to the sidemount where the H-shifter sits.
Adding some vinyl carbon transfer to the front and it looks really sharp 😀


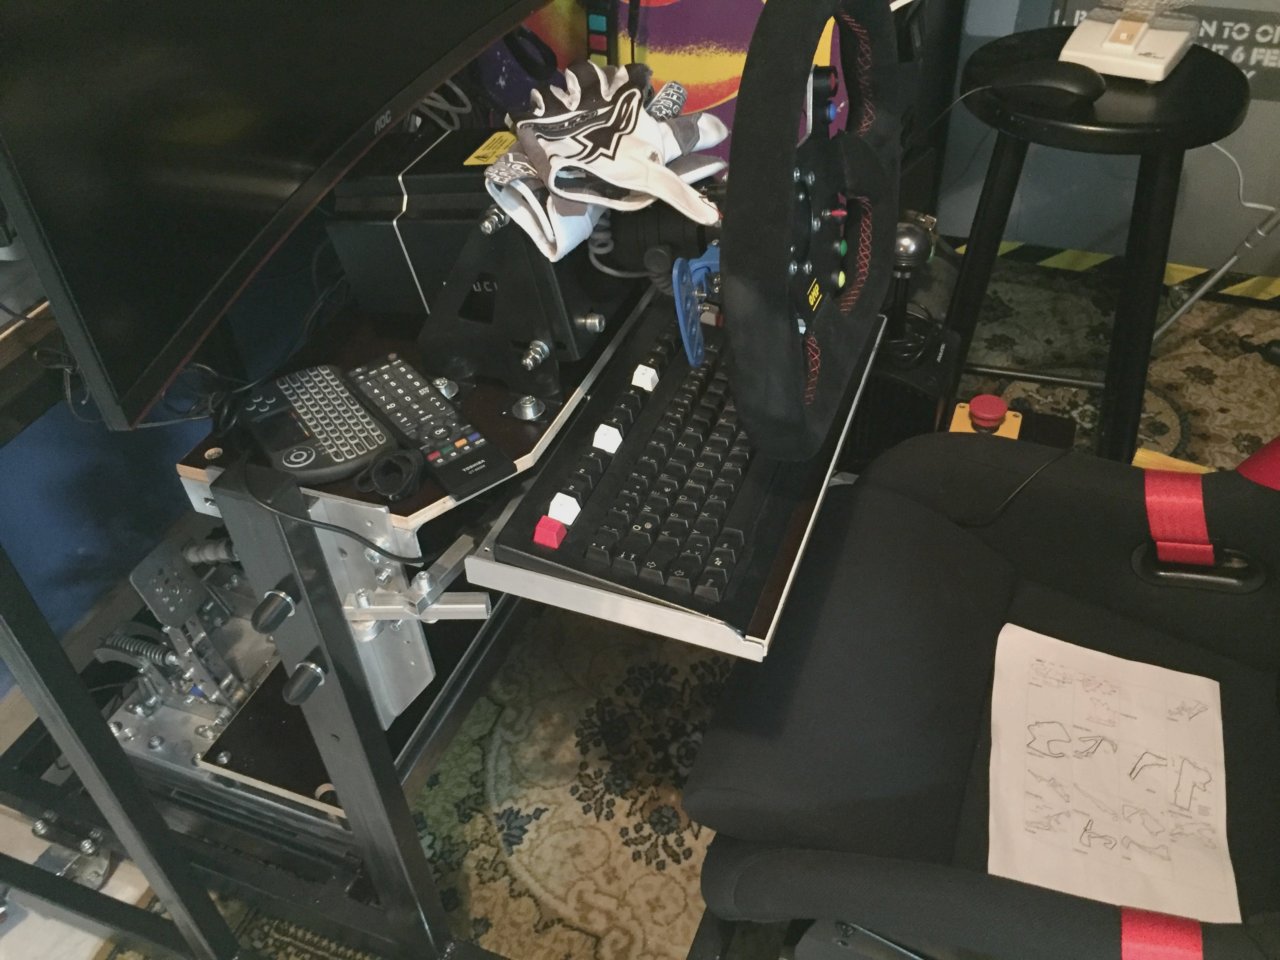
That’s the current view you’ll get as a driver at you cockpit.

CU next time!