
For quite some time I have been driving with my Fanatec CSL Elite and the default wheel. But I wanted to have a bit more racing like wheel and I found a nice Sparco P104 Limite clone.

To use this wheel with my CSL Elite I got the UniversalHub for XBoxOne from Fanatec, which comes with a 7-wey funky switch, 4 button clusters – 3 buttons each – and large and small shifter paddles.

I really tried my best to get the buttons an switch arranged as I needed them, but in the end, I wasn’t satisfied with the result.
It was no big problem, but not all the buttons were easy to reach and I really didn’t like the look of it. So I thought, it should be possible to connect regular switches on a selfmade buttonplate to the hubs inputs – and I was right!
In the manual and on the Fanatec Owners Facebook-page I got the right information, I needed!
The button clusters all have individual connectors on the pcb, every cluster has one ground and 3 input pins.
First I thought it would be nice to have all buttons share one ground, but that didn’t work out as intended.
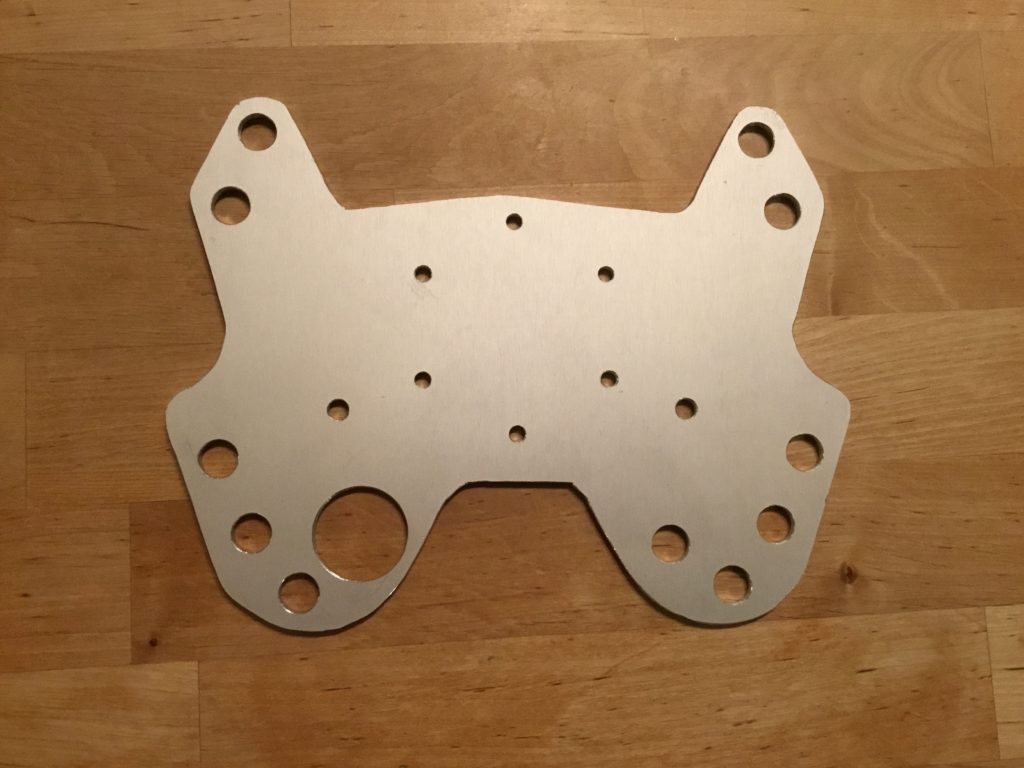
As first step I started FreeCAD and designed the buttonplate which should be mounted between the wheel and the UniversalHub.
When the first design was done, I 3D-printed some 2mm templates to test fit to the wheel and see if the button placement was ok.

Once I was really satisfied how everything turned out, I used the template to trace the lines and holes to a 4mm aluminium plate.
Cutting everything with a jigsaw and drilling all the holes didn’t take too long. A bit of filing on the edges to make everything smooth and I could add the layer of black paint.


To mount the 7-way-switch I used the already added arm and drilled 2 holes (the countersunk holes above) into the plate so I could srew it on.
Also a 2-way switch on the opposite side of the funky switch has been added (mapped to ABS).
After a last test fit it was up to the electronics part.
The Universal Hub gives you the opportunity to connect up to 5×3 buttons to it, each 3-input-cluster shares one ground pin. The best fitting connector to use are JST ZH 1.5MM 4 pin female connectors, which are really easy to find and quite cheap, so I got quite some packs of them 😉
They don’t fit perfectly onto the pcb, you will have to cut off the small noses left and right of the main body. On the picture, the white cable of the connector is the common ground.
So I soldered 3 buttons to each JST connector. On the picture below you can see the red, white and black (hard to see) cable going to one button each, the white cable connecting all 3 buttons together.


Finally everything has been mounted and works perfectly!

The other addon-wheel I have is a D-shaped rim and I made a buttonplate for it, too. This time, instead of spray painting it, I decided to cover it with carbon fiber vinyl.


Since I made this modification, I switched from the CSL Elite to a Simucube 2 base.
I kept the wheels and buttonplates and added an Arduino Pro Micro as standalone USB-solution for the rims (featured in another post).
Wow that is so cool, glad i found your post! I do have a question regarding playstation support, do you think it will work on playstation if i get the universal hub v2, podium hub or SRM emulator. they all let you wire button pods but no idea if it will work on PS5.
Also which buttons did you use?
I just checked the fanatec website: either Universal Hub v2 (NOT the “for XBox” version!!) or the podium hub are “PS ready”, so should work on PS5.
The buttons are cheap ones from Aliexpress (like those: https://www.aliexpress.com/item/1005006040498712.html), but for my Ferrari GTWheel I opted for the (much more expensive) Otto P9 pushbuttons.